
How to Send MMS Messages After a ThruTalk Campaign
Instant Follow Ups let you send text messages during a ThruTalk call, but they don't support media attachments. If you want to send an image, PDF, GIF, or video to contacts after a calling campaign, you can use ThruText to send an MMS message.
MMS (Multimedia Messaging Service) is a type of text message that includes a media attachment. You can use MMS to share voter guides, event flyers, or other resources with contacts who have agreed to receive follow-up messages.
This guide explains how to collect contacts' permission to receive texts in ThruTalk, export their information, and send a campaign with a media attachment.
TABLE OF CONTENTS
- How to Send MMS Messages After a ThruTalk Campaign
Before You Begin
You will need access to a ThruText account with an approved use case for sending messages. Review our guide MMS Approval - Adding Sample Media to a Use Case for details.
Step 1: Collect Permission to Send Texts in ThruTalk
Before sending follow-up messages, ask contacts if they want to receive a text. You can collect their responses and preferred phone numbers using questions in your ThruTalk campaign script.
- Open the script for your ThruTalk campaign.
- Add a multiple-choice question asking whether the contact wants to receive a follow-up text. For example: "Would it be okay to text you additional information?"
- Add Yes and No as answer options.
- Branch the Yes response to a freeform question asking for the contact's preferred phone number. For example: "What's the best phone number to text you at?"
- Save the script and use these questions during your calling campaign.
These questions help you identify which contacts agreed to receive a text and which phone numbers to use for your ThruText campaign.
For more information about creating scripts, see our guide on Creating a ThruTalk Script.
Step 2: Export Contacts From Your ThruTalk Campaign
After your calling campaign ends, export the call results to identify contacts who agreed to receive follow-up text messages.
- Open the completed campaign in ThruTalk.
- From the Campaign Summary Page, click Exports.
- Generate a Campaign Dials export.
- Download the export and find the responses to your text permission question.
- Identify the contacts who answered Yes and collect the phone numbers they provided.
- Create a new contact group using these contacts and their preferred phone numbers.
You can use this group when creating your ThruText campaign so your MMS messages go to the contacts who agreed to receive additional information.
Step 3: Prepare Your ThruText Account for MMS
Before creating an MMS campaign, upload your media file to the ThruText Media Library.
Upload Your Media File
The Media Library stores the images, PDFs, videos, and other supported files you can attach to ThruText messages.
- Open your GetThru account.
- In the left sidebar, expand ThruText.
- Expand ThruText Tools and click Media Library.
- Click Add Media to Library.
- Select the media file you want to send to contacts.
- Wait for the upload and processing to finish.
For more information about uploading and managing files, see our guide on Media Library - Managing Files for MMS.
Step 4: Create a ThruText Campaign With an MMS Attachment
After creating your contact group and preparing your account for MMS, you can create a ThruText campaign using the contacts from your ThruTalk campaign.
Create Your Campaign and Select Contacts
- In the left sidebar, expand ThruText.
- Expand Campaigns and click Create New Campaign.
- Enter your campaign information and continue to the Targeting step.
- Select the contact group you created from your ThruTalk export as the campaign's target group.
- Choose a sending phone number associated with an MMS-approved use case.
- Click Save & Next to continue to the Initial Message step.
Add Your MMS Attachment
- In the Initial Message step, enter the text you want to send to your contacts.
- Include a brief reference to the previous ThruTalk conversation so contacts understand why they're receiving the message.
- Click Add Media.
- Select the image, PDF, or other media file you uploaded to your Media Library.
- Confirm that the media file appears in the message preview.
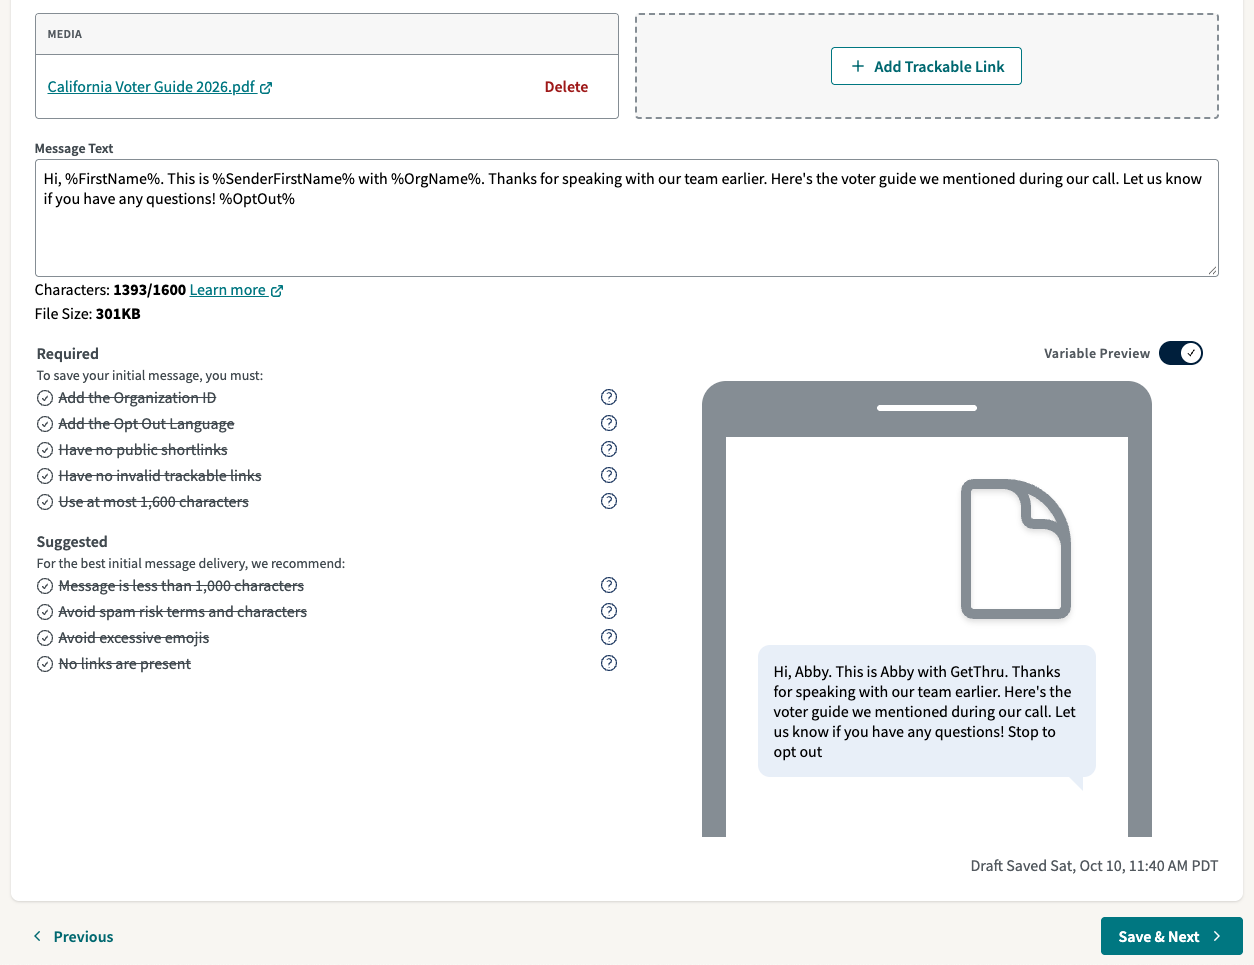
For example, if your organization called contacts about voter registration, you might send:
"Hi! Thanks for speaking with our team earlier. Here's the voter guide we mentioned during our call. Let us know if you have any questions!"
Attachment: Voter_Information_Guide.pdf
ThruText MMS messages can include one media file and up to 1,600 characters of text.
For more information about creating campaigns, see our guide on Launching a ThruText Campaign.
Step 5: Preview and Send Your MMS Messages
Before launching your campaign, review the message and attachment to confirm that contacts will receive the intended information.
- Review the Message Preview to confirm that your media file appears with the message text.
- Check that your campaign targets the correct contact group.
- Review your campaign settings and complete the remaining setup steps.
- Test the message using a small campaign with your own number or a colleague's number to confirm that the attachment displays correctly.
- Launch your campaign and send the initial MMS messages.
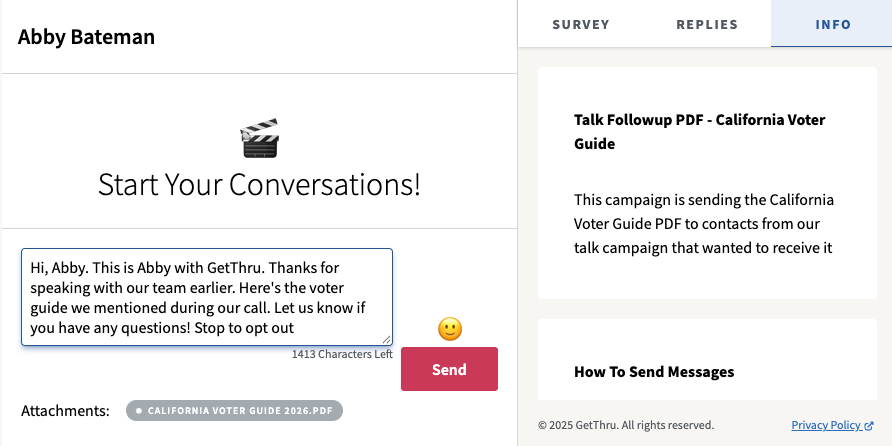
If contacts respond to your message, your senders can continue the conversation through the ThruText assignment page. You can also create recommended replies for common questions.
Troubleshooting MMS Messages
- I Don't See the Add Media Button: If the Add Media button doesn't appear when creating your campaign:
- Open Brand & Use Case Registration and confirm that your use case displays MMS Approved.
- Return to the campaign's Targeting step.
- Confirm that you selected a phone number associated with the MMS-approved use case.
- Return to the Initial Message step and check for the Add Media button.
- My Media File Won't Upload: The Media Library accepts files up to 10 MB, but the file must be 750 KB or smaller after processing to be eligible for MMS. If the upload fails, check the file type and size. Try reducing the file size or using a different supported format before uploading again.
- My PDF Doesn't Show a Preview in the Media Library: PDFs appear with a placeholder image in the Media Library instead of a thumbnail of the document. This doesn't necessarily indicate a problem with the file. Click the three vertical dots next to the PDF and select Open to review it.
If you have any questions, contact support@getthru.io for assistance.